Showing posts with label food. Show all posts

Wednesday, May 22, 2013

Upside Down

My mother is pretty much the best mom ever. Now that I have a big kid AND a little baby in the house, I really don't know how she worked a (more than) full-time job, made all of our food at home from scratch, and took care of us with my dad working an hour away (ie, he got home late and left early).

Not only that, but when we went to people's houses, had meetings, etc (both of which seemed to have happened a lot - or at least that's how I remember things), she BAKED stuff to take.

There are two things in particular my mother used to bake. Both from her copy of The Joy of Cooking. Butterscotch Brownies, and Lightning or Whipped Tea Cake. Both recipes are only found in the form I know and love in the 1975 edition, and both are awesome. I highly encourage you to try them. They are dead simple and so tasty!

And forget about Christmas. We would make 3 - 5 different kind of cookies, decorate them all (just to put it in to perspective the last year we lived in the US and did this on a large scale, we were 10, 5 & 3 years old. And food coloring was involved. You do the math), package them (with ribbon!) and distribute them to friends, neighbors & colleagues.

While I always made me own cakes on my birthday (as soon as I was old enough to... which was pretty young. I don't remember when it was...), every year on my Dad's birthday she makes a Pineapple Upside Cake. And ohmygod it's the best thing ever.

I went through a phase of craving my mother's pineapple upside down cake. I have the 1946 edition of the book (blue cover) here with me (the 1997 edition I left in storage. It sucks) in NC, and so excitedly made the Pineapple Upside Cake.

It's probably a good thing I accidentally left the camper door open for less than a minute while I got something from the fridge outside said door.  The chickens swooped in and ate it (they respectfully left the pineapple rings on the plate). But it was obvious from the batter and the way it baked up that this was NOT my beloved cake.

I humbly asked my mom how hers was so good... and here it is folks. The secret to her amazing AMAZING cake.When she was here with me after the bebe was born and I FINALLY could manage to get out of bed - the craving for this cake kicked in. Full force. I made the cake.

The topping is a la the true recipe, and the cake part is the aforementioned Whipped Tea Cake. Whoa. Mind blown. Alas, it does not exist in any other edition that I have found, and so she scanned her recipe page and sent it to me:

Original page
I made the bottom cake portion true to the recipe - I happened to have cake flour on hand, and we needed to buy sugar anyway.  In Japan cake flour was not easy to come by, and we never had white sugar in the house. Only light brown (my mother does not pack her brown sugar when measuring. Ever.) My mother never had cake flour - and this recipe never suffered from substitutions.

It was exactly what I wanted needed, and was amazing.

Yesterday I craved it again. I didn'/t have any pineapple in the house, but I have a whole bunch of frozen fruit. I happened to have an open bag of cranberries, so used those. Awesome.

Soft cake. Crispy edges. Gooey nuts. Ohmygod.


RECIPE (PINEAPPLE VERSION)
Adapted from the Joy of Cooking

Topping:
1/4 cup butter
1/2 cup brown sugar
1 cup walnuts
8 slices of pineapple*

Cake:
1 3/4 cup cake flour
1/2 tsp salt
1 cup sugar
2 eggs
1/2 cup + 2 1/2 teaspoons milk**
1/2 cup room temp butter
1 tsp of vanilla extract
1 1/2 tsp baking powder

Make Topping:
  1.  Melt butter in a 9-inch (you know, the regular size) cast iron pan.
  2. Add sugar. Stir until all the sugar is wet. 
  3. Turn off heat.
  4. Mix in nuts
  5. Lay out the slices of pineapple in a ring with one slice in the middle on top of the topping.
Make Cake:
  1. Sift cake flour, salt & sugar into a bowl.
  2. Add eggs, milk & soft butter.
  3. Beat the hell out of it with a hand mixer. You're aiming for light and fluffy here.
  4. Fold in baking powder.
  5. Pour on top of pineapple & topping
  6. Bake at 350 for 40-50 minutes, or until done. You don't want to overcook it - the sugar topping will burn
  7. Let cool - but only kinda.
  8. Flip the cake out onto a plate when the cake is cool, but the topping is still a bit warm. If you let it cool all the way down, you'll leave the topping behind in the pan.
  9. Hide somewhere alone and eat the whole damn thing.

Cranberry version:
I did the same as above but substituted one cup of cranberries (what was left of the bag) for the pineapple. If I were to do it again (and I will) I would do a whole bag (2 cups) of berries and add a dash of cinnamon. I did not adjust the sugar level - with the berries being frozen they stayed in their berry form and I liked the tart pops in the sweet topping. If you don't, you could always cook the berries a bit in ONLY the butter (until they burst) and then add the sugar. You don't want to cook the sugar as it'll get too hot when it bakes and you get grainy topping. It's ok if you're into that sort of thing. I like it gooey.

*most of a can. Leaves enough pineapple juice for a cocktail with a slice or two for 'garnish' :)
** Yes. It seems silly. But you have to have the 2 1/2 tsp milk. Trust me on this.

Wednesday, March 20, 2013

Never Rains But It Pours

So... we're not getting any new chickens this spring. Other than the 3 bitties we have that hatched, that is. But odds are at least 2 of those will be roosters, so my point is: we're not getting any significant number of new egg layers this year.

What this really means is that EVERY hen we have now will go into a molt and stop laying for the late fall and winter months this year. Which means no eggs. (or very, very few). Last year we didn't get any eggs for about 2 months. I even *gasp!* bought eggs. (From the co-op. Pastured.) As close to MY eggs as I could get. And worth the price to not be too greatly disappointed by the difference in quality.

And now that it is springtime every hen we have is in laying overdrive. For a while a few of them were laying off in the woods (as you may know) where we couldn't find them and all was OK in the world. This week everyone has gone back to laying in one of our 10 nesting boxes (although I keep getting hens coming out of our new shed with no door squawking their egg-laying achievement... I just can't find any...) and we have more eggs than we know what to do with. As in 8 - 12 eggs a day. Oh boy.

But the chest freezer (best birthday present ever! Thanks Lone reader!) comes in here to the rescue. You can freeze eggs. Woohoo!!

My favorite method is not below. Because my favorite method involves cracking one egg each into the well of an ice cube tray, freezing them, and then popping them into a big old ziploc bag. Wash, rinse, repeat. That way you can pull whatever number of eggs you may require at a time and use as needed.

Alas, I currently don't have any ice cube trays.

And I can not find one with big enough wells for a whole egg (and I don't live in the bay area anymore so those awesome Asian dollar stores that always carry this sort of thing is beyond my reach...).

So my second favorite method:

Figure out how many eggs you want to put in each bag. Label said bag. Use a big sharpie. You know you want to.

Put the bag in a cup, bowl, tupperware - anything that will hold the back with its contents. Flip the fastener portion over the sides to hold it in place, and to help keep from getting egg on said fastener. You're welcome.

Break all yolks. You don't want to add air - just bust them. Why do you do this? No idea. But anyone I've ever spoken to who freezes eggs does this. If you know, let me know.*

Lay flat, and put in freezer flat. That way they will both freeze and defrost faster than if you leave them in a clump. In fact, whenever you freeze anything in a bag, you should do it this way. Again. You're welcome.

This pile of eggs (plus another 8 I pulled from the fridge)...

...turns into this pile of shells.
I freeze them in 6 egg chunks because that's the amount I use most frequently. I don't bake a lot of cakes, etc, anymore - but I make a lot of fritatas. And when I do it's usually in 6 egg increments. So really whatever works.

What to do with the shells? You can do any number of things. I dry them out, grind them up, and feed them back to my chickens. It's the best way for them to absorb calcium back into their systems, and that way we don't have to buy any other supplements for them.

They're also great in gardens. Many many plants do well with a calcium supplement (brassicas and tomatoes are probably the most famous...) and you can grind them up finely and sprinkle on top of the soil, or in the bottom of your transplant hole when putting in seedlings. Or you can grind them up more coarsely and sprinkle around the base of your plants to help deter slugs, cutworms, and a number of other garden pests that might not enjoy crawling over such a sharp surface.

Some people with more time and energy than I blow the eggs out and use the shells for crafts. (I wish I had the energy!).

Or toss 'em in the compost pile.

*If you freeze the whites and yolks separately, you do need to add a scant amount of salt or sugar to the yolks to keep them from coagulating. These two things may be related. My chemistry's not so good. And my copy of Harold McGee is in storage and I can't get to it. So. Again. If you know, let me know.

Wednesday, March 07, 2012

Survivors

Remember all my griping about the season being early and me being later than normal? Resulting in my being about 2 months behind? Well. I was so excited to get a day off without rain so I could catch up...

So when I went out this morning I was super bummed to find that not only had my seed trays fallen over in the wind, but my row covers had floated up in some places, and the (damn) chickens destroyed all but a few of the green things.

Chard & Kale

Lettuces
I got myself together and decided that I could still get my plants in - even though my broccoli starts were about ready to go in (I TOLD you I was running late!), I will try sowing directly in the ground and see what happens. If I can get my act together and use shade cloth this year, I might be able to get a few heads in before the heat really sets in.

Assuming we can get the rainwater irrigation system in.

I DID manage to get all the current beds that aren't being occupied (about 5) hoed and weeded, and I put up the deer netting I saved from last year up around them. At 3' ft high, they won't do much against the chickens should they really want to get in,  but at the very least I get the satisfaction of a) having done something constructive, and b) the mental image of them running towards the greens, only to be thwarted by some invisible wall. A la Time Bandits. I love my chickens dearly, but they can be destructive as hell sometimes. And if it stays nice this weekend, I have Saturday open and allocated to figuring out a chicken barrier scheme...

But there were a few survivors... in my hacking away with the hoe, I came upon several carrots, 2 Anise Hyssop plants, and an Oregano plant (3 beds and 12ft away from where I planted seeds last year...). The carrots will be dinner this evening. For us, not the chickens. As for the herbs, I picked them up out of the detritus, popped them in some pots, and hopefully their luck will continue to hold out!

The chickens scratched the mulch up over this little guy... and he escaped the fowl play that got the others...

Whoohoo! There turned out to be about twice as many as this handful. The patch I planted for seed also escaped and overwintered fine. Hopefully we'll be planting our own seeds next fall.

Oregano, and Anise Hyssop x2

Friday, January 20, 2012

Breakfast for Dinner

Even though the chickens have slowed down a bit in their laying, we have managed to amass 2 dozen eggs. I don't get enough reliably to try to sell any, but with our oversleeping and not being home for breakfast a lot recently, we have a big of an excess. And while fresh eggs last a loooong time, real estate is at a premium around here so they must get eaten.

And sometimes breakfast for dinner is awesome. But I wanted to get in some veggies. So I made a compromise and made a frittata (of sorts) with spinach and peas in it...with a side of hash browns and pork jowl bacon. So happy!

Eggs. I ended up using 8. I adjust according to how much filling I have.

Even with crappy lighting, you can tell these eggs are beautiful.

Grating.

I finally learned how to make them well. Thanks for the inspiration Indy!

Spinach, peas, onions.

Frittata, hash browns, jowl bacon. Yum.

Wednesday, January 18, 2012

New Year's Resolution

Most years my New Year's resolution is a resolution NOT to make any. For if you don't make any, you won't break any. But 2011 was an odd year for me, and let's just say that with the amount of responsibilities I managed to take on, one little resolution shouldn't be TOO difficult...

I do have a tendency to go on and on about said manfriend, but in all seriousness - nothing out here would work without him. And since he is so pulled in many directions and does many things for so many people, I figure he should have ONE thing done for him - consistently.

Dinner. I settled on dinner. I will make dinner for the 3 of us, everyday. I had already been doing it more often than not, but with my working nights 2 or 3 nights a school week, those days were up in the air. Now I make sure that there is something on the stove or in the oven or something for when he and the spawn get home and I'm not here.

What I DIDN'T count on was how this would benefit me. (This is, after all, supposed to be about the manfriend). When I work nights I often bring something home with me - soup or a salad or something - and I don't usually end up eating what I've left for them. But. Working nights means I'm home in the mornings...and soups/stews are the easiest thing to reheat and get better with time (not to mention being seasonally appropriate). And so I end up eating the leftovers for breakfast. And I think I might be getting the better end of the deal here ...

Split pea and ham hunk soup. With Rye toast. For brekky. On a day where I had more energy, there would be a fried egg on top. But that might make the boys *too* jealous.
Maybe next year my resolution will be to make my own chicken feed...

Friday, December 23, 2011

Happy Christmas

When I was little, one of my favorite activities around the holidays every year was making oodles of Christmas cookies to give away to friends/family/neighbors/co-workers. (except for that one year we made the salt dough Christmas ornaments with the alphabet cookie cutters in everyone's initials. That beat cookies). My mom would spend HOURS with the three of us making dough, cutting out the shapes, baking and decorating the cookies... gobs of confectioner's sugar everywhere and food-coloring stained little kid hands. Sprinkles, silver balls, Christmas carols.... culminating in cracked out cranky kids, an exhausted mom, and a bunch of curly-ribbon clad cookie pacages. That my mother would then make us deliver with her. Thankfully we lived on a prep school campus, and most of this could be achieved by walking.

This year I coerced the Spawn into making Christmas cookies with me. He was a little trooper and put up with my Christmas cookie shenanigans replete with carols playing, and plastic cookie cutters. I am very thankful to the Spawn for letting me have that day of Christmas cheer (he got to play a fair share of videogames, too, so I know he stayed happy), and happy for us not ending up cracked out or cranky.

Granted we would have been done a lot faster if I could get more than one 15x10 cookie sheet in the oven at a time. Someday!

Roll and flip. Roll and flip.

Cut out those shapes - as close together as you can!

Ready to go in the oven.

Color Mixologist.

Decorating.

Ginger cookies. Notice the Airstream Custom oven. Teensy yet effective.

Drying*

My fave**

*They got 3/4 of the way dry and then it started raining BUCKETS. Since the Airstream is a tin can, not much of the humidity made it back outside. Most of it got sucked up by my cookies. Only the few duds I had set aside for family consumption (another family tradition) survived the great humidity of 2011.

**even this one bit the dust. >sad face< 

Monday, December 19, 2011

Comfort Food

Don't mind the dirty dishes. Feast your eyes on comfort food, Stoneyhaw style. This is how we do things around here.


Friday, December 09, 2011

The Circle of Life

This is a serious thing. Something that I think about a lot. With the chickens that I use for eggs, meat, and laughs, the deer meat I get from neighbors and friends, the animals around me....the seven year old I am watching (in awe!) grow... the man I love dearly...

You may remember that one of my chicks didn't survive more than a few days when we first got them. I felt an overwhelming sense of responsibility and remorse for that little guy. I felt responsible for putting him through the trauma of travel by mail...

And yet I eat meat. I feel responsible for every part of whatever meat comes through my home... and while I shouldn't feel any more or less responisble for meat that I purchased rather than raised/killed, but I do feel a difference.

I have linked to this guy before, but there was a GREAT post the other day On Killing that I read, and that is essentially all I have ever really wanted to saw on the subject, but waaaaay better and more eloquently written. I love this guy.

Tuesday, October 11, 2011

One Thing Just Leads Into Another - Butter!

Working at a co-op means I basically work at a grocery store. (Basically). One of the perks of working in such a place, is that expired food is often up for grabs to the staff - and grab it we do (it also helps to be nice to the guys in grocery. They're nice guys anyway, but it's nice to get the headsup when stuff goes out of date and becomes available to us vultures).

A few weeks ago 6 pints of Organic (co-op!) Heavy Whipping Cream went out of date. One of the grocery guys who I've become friends with came up and off-handedly asked me if I wanted them. Umm. Yes. He looked at me like I was insane, but I thought it would be a good opportunity to make butter with the spawn. Besides, homemade butter is SUPER tasty, and unless you've got farmer friends, get a realy good deal at a farmers' market, or you come into some out of date cream, who's gonna spend the money on cream just to MAKE butter?

It's totally worth it, mind you.

But I digress. Back to butter.

First: get a butter churn. You can also use a mason jar and shake, but let's face it. This is tiring, and not nearly as fun as this:

The Modern Butter Churn. Or a stand mixer, if you will
Then pour in the cream, turn that puppy on, and stand back. I also drape a towel around the bowl as I have a tendency to skip the low and medium settings and go straight for high, thus sending cream all over everywhere.

I might have to interject that you really can't screw this up - in fact, if you've ever screwed up whipped cream and gotten a dry mass, or worse, a broken mass, then you've already embarked upon the journey of butter making. Relax. You got this.

Whipped Cream.
 If, at this point in time you remebered that you have some berries, fruit, cake, or some such item that may need a whipped embellishment then feel free to scoop some out and take a tea break. Otherwise hold your horses, you're not done yet.

And now the Whipped Cream is starting to look dry....
 Keep going.

You can kind of see liquid pooling up...this is buttermilk.
You'll see yellow clumps forming up here and there amongst a pool of white liquid. This, my friends, is what you've been waiting oh so patiently (yeah - like 5 minutes if you've used a mixer) for. The yellow clumps are butter. The white liquid is buttermilk. This is NOT the cultured buttermilk that you can buy, and unfortunately is an uncommon item here in the west. I love it. I use it in all sorts of baked goods. Umm. Yum.
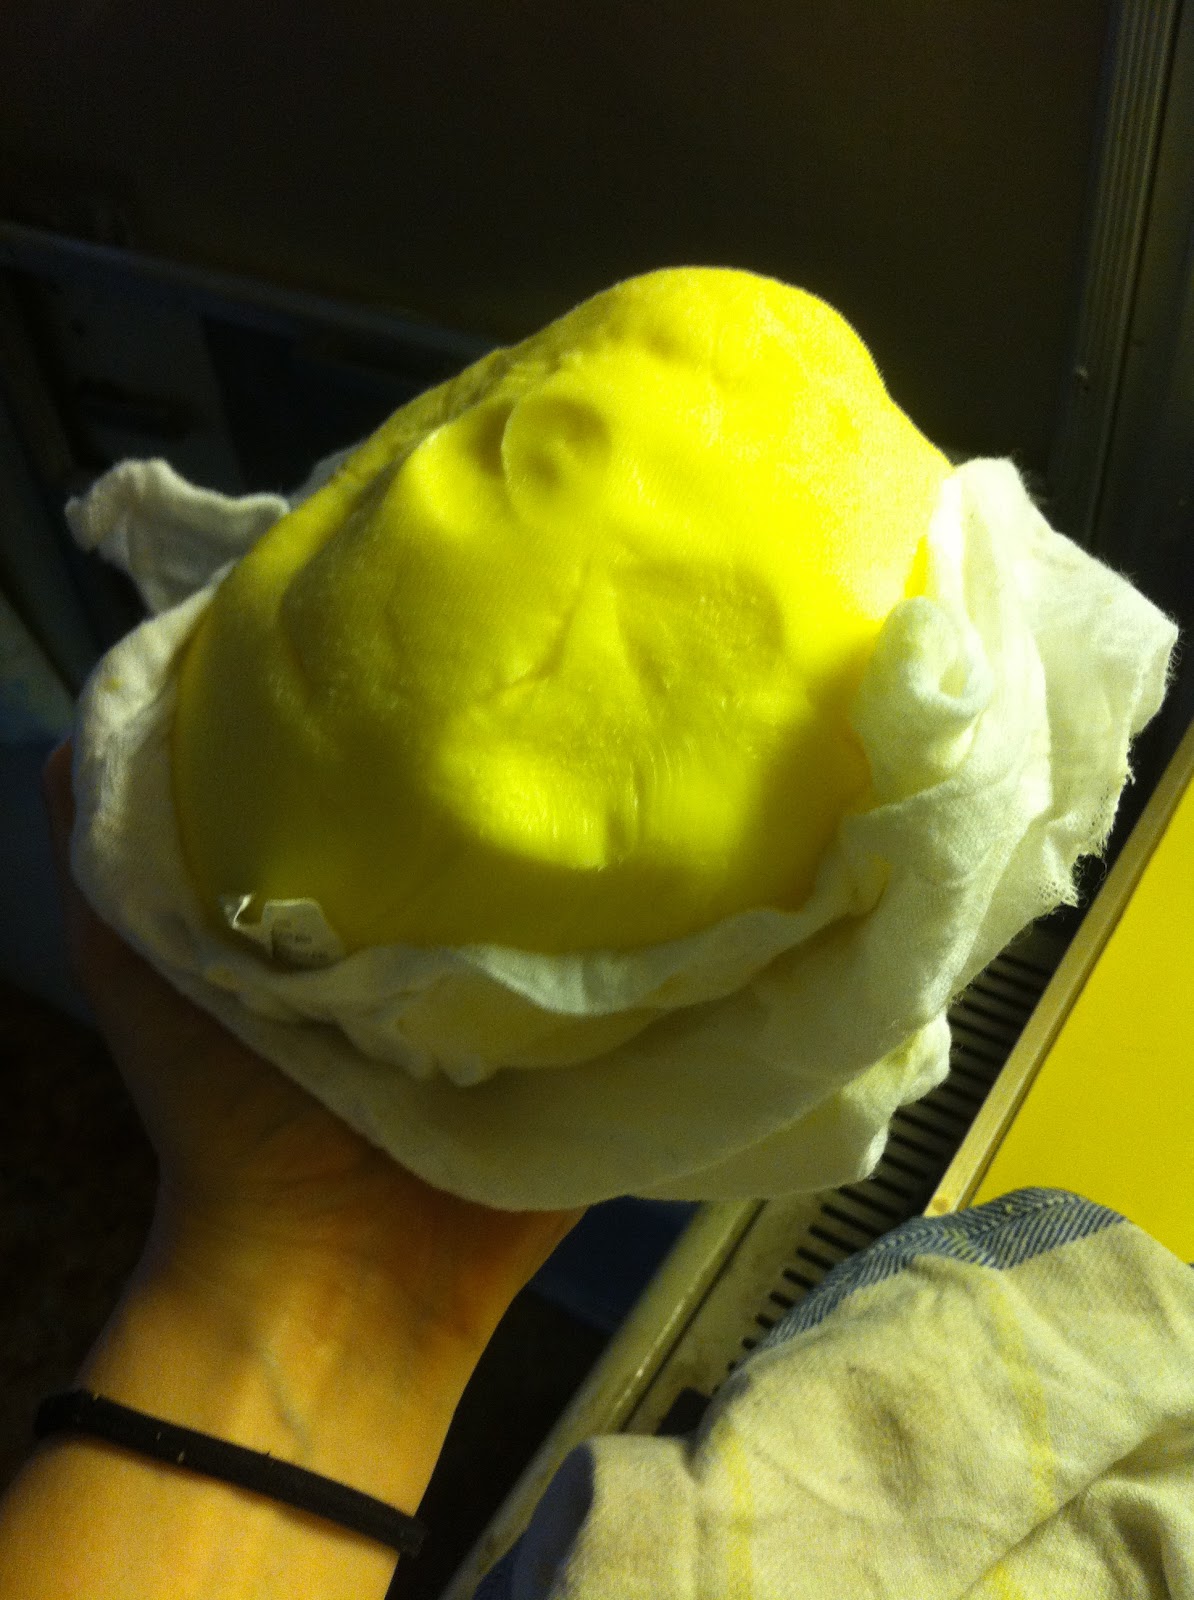
Next up: strain the buttermilk out from the butter. (and save the buttermilk!). I put a strainer over a (usually too small bowl), line it with a floursack towel (traditionally butter muslin or real cheesecloth. Do not use 'cheesecloth' bought at the supermarket. We will no longer be friends.). Then instead of patiently waiting for most of the liquid to strain out, I gather the corners and squeeze, getting all of the buttermilk out of the butter, and a fair amount of it all over my counter.

Strained, unwashed butter
You still have another step before you can devour said butter. You gotta wash it. That sounds weird, but when you've just strained it it's still got pockets of buttermilk here and there, and they'll make the butter go rancid rather quickly and you don't want that.

What I do is put the butter in a bowl, run cold water into it, knead it a few times with my hands, rinse, repeat. After 2 or 3 times the water will run off clear - and then you're done!

Washing, washing.
 Then strain. Again.

Butter!
 At this point you can add salt if you want. Or herbs, if you feel the need to really go for it. I love salted butter, but have a tendency to leave this stuff unsalted - so I can put a big pat of it on warm bread and srpinkle some salt on top. (OK. Wishing I had some now!)

One thing tends to lead to another, and now that you've made tasty tasty butter, and you have tasty tasty buttermilk, you gotta make tasty tasty bread.

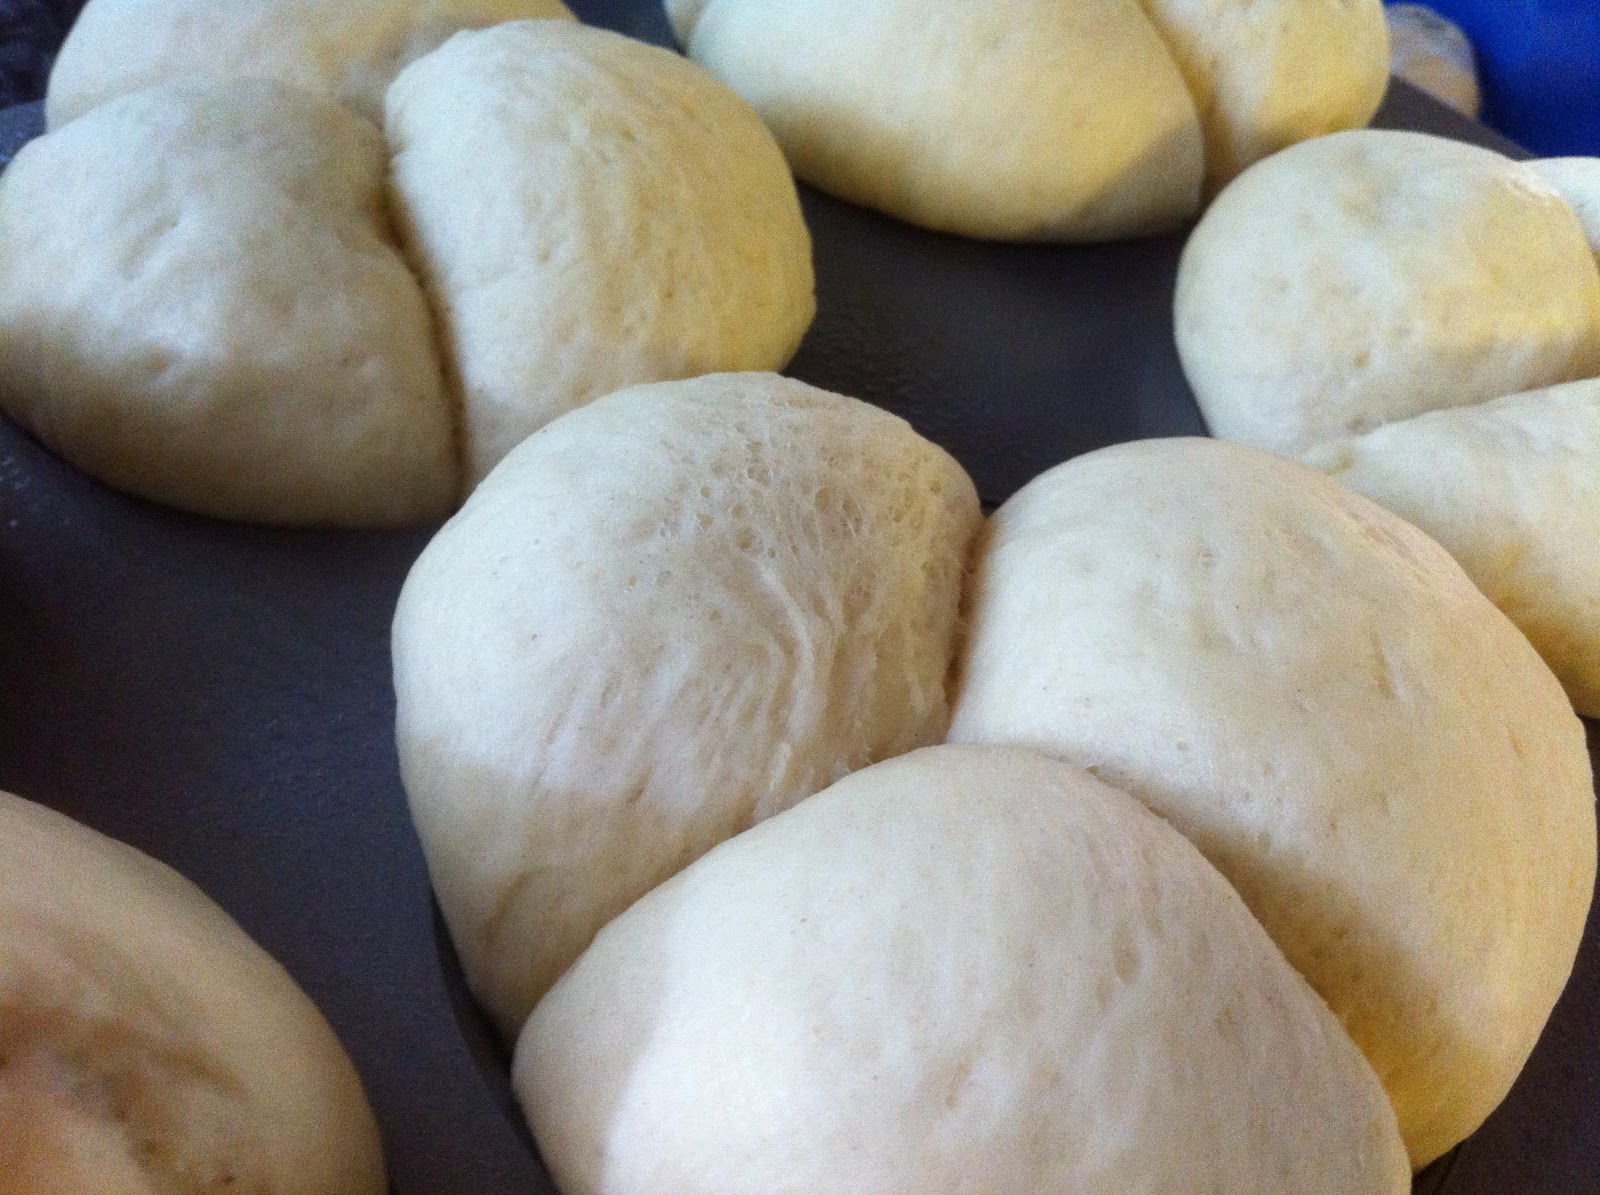
I make cloverleaf rolls out of the Joy of Cooking, but this recipe is similar. The main difference seems to be that JOC uses butter, not shortening (butter!). Regardless, you're replacing the milk in the recipe for the buttermilk you just made. I ALSO highly recommend making pancakes with said buttermilk. Awesome.

Buns!
I am one of those people that insists on making everything from scratch once. Be it bread, soap, pickles, whathaveyou - so I urge you to try making butter once, if you aven't already. And if you have - then revisit it! So much fun!

Oh - and I ended up making the butter myself and without the Spawn, although he and the Man both thoroughly enjoyed the final product. I did tell the little guy all about the process, and much to his boredom and my surprise - his class ended up making butter at school the next day. Hehe.

Friday, April 15, 2011

Weird Food

I came across this post* today, and was reminded of weird food I used to eat in boarding school in Japan.

Now I have to interject - before I really get started even - to say that there's weird food and then there's weird food. I am not talking about food that is innately weird to you but wouldn't be to a Japanese person (Tamago Gohan, for example. Yum. One of my all time favorite breakfasts and yet another reason why I want chickens!). I am talking about bona fide weird-ass foods. Got it? Good.

Our boarding school had a strict 3 meal a day sit down thing going on - and the dreaded stint of kitchen duty always seemed to come around waay more often than necessary. However. On Sundays lunch was not a sit down affair, but a show up for roll call and take it away bread lunch.

OK. Another goddamn interjection. Bread, or "pan" (I always thought it was derived from french, but Wikipedia disagrees with me) in Japanese, encompasses all things bread in Japan. From sliced bread (that's about 1 inch thick and resembles what we make Texas Toast out of here) to savory breads stuffed with curries and stews, sweet breads stuffed with sweet bean paste, pastry cream or chocolate - steamed breads, fried breads, baked breads.... suffice it to say there are a lot. Basically think of a food, slap the suffix '-pan' on the end, and some bakery somewhere in Japan is selling it.

So. For this relaxed Sunday lunch we usually got a sweet bread and a savory bread. On really lax days for the savory option they gave us a slice of bread (aforementioned monster minimally 1-inch thick white bread that's perfectly *perfectly* square...) and a little plastic container of sweet peanut butter spread crap. Blech. Thankfully the cafeteria was decked out with 4 toaster ovens (about 250 girls lived in my dorm...), and a few of my friends and I improvised. We came up with the Best. Thing. Ever. (or at least the best thing since sliced bread. ha!)

First you take a slice of monster white bread. Then, being very careful not to smoosh the fluffy that is the actual white part of the bread, you squirt on a healthy dose of Japanese Mayo. Only Kewpie brand will do, really. Yes. They sell it here in the US. (and check out the history of the company - they've been making it since 1925!) Worth every penny. Admire the fantastical star tip they inexplicably put on the squeeze bottle of mayo and the pretty designs it has created, and then using the side of the plastic knife that came with your individually packaged slice of monster bread, spread. Gingerly people! Do NOT ruin the integrity of the floofy.

OK. That done, mix up a package of Natto (I like Okame brand the best. This can also be found in Japanese and Asian markets here in the US. Be sure to use all of the included sauce and Chinese mustard. What? You don't like Natto?!?! We can not be friends. What's NOT to like in a small styrofoam box of fermented soy beans that smells like a cross between foot and foot fungus?!). Spread Natto on top of Mayo. Need I remind you to mind the integrity of the softness? No? Good.

Next. Put a fair amount of shredded (crappy) dry mozzarella (as processed as possible to get that authentic high-school-my-arteries-are-made-of-steel-devil-may-care-or-not-attitude feel) over the whole thing. I'm not sure why we always had crappy shredded cheese, but we did. This tasty concoction was thought up using stuff we always had on hand, so we must have.

Transfer the whole thing to the toaster. This process will definitely include a minor panic attack induced by the weight of the toppings making the middle of the bread sag and looking like the whole thing will fall, but you must push through. Toast on the rack (not the tray. Unless you like soggy bottoms) until the top is brown and bubbly.

Attempt to eat said creation, burn the shit out of the roof of your mouth, swear profusely, and continue eating. Seriously. It's the Best. Thing. Ever. (And I haven't thought about it in years!)

UPDATE: not 5 minutes after I originally posted this, I got 2 emails slamming me for not posting a picture. Please forgive me (sarcastic tone). I just can't recreate it authentically in a timely manner. You're just going to have use your fantastic(ally unused) imagination on this one. Snarky? Not me. No. Never!


*and I can't wait to try frying my grilled cheese in mayo. Both grilled cheese and mayonnaise are sacred items in my house, so it only seems natural that the two should be married, IMHO.

Friday, March 11, 2011

Oh Snot Juice! I Haven’t Forgotten You!


People used to always remark on the large jar of strange brown liquid that occupied a very prominent shelf in my kitchen in my beloved cabin in Point Arena. At the restaurant I had a pet sourdough starter, after the restaurant I had a pet Kombucha SCOBY.
I had to give up my beloved SCOBY when I left – I was in transition and hanging out in Vancouver BC with my family for a few weeks, and then after that I was driving across country, so not the most SCOBY friendly of situations.
Not long after my arrival in NC, my previous employer hooked me up with a new SCOBY, and now it occupies a prominent shelf in, of all places, my Airstream bathroom. It’s the biggest shelf I have, it’s out of the way, and it gets the most sun (read: it's often the warmest spot in the camper....I do NOT advocate direct sunlight on your Kombucha....that would be bad.). It’s perfect.
I’ve just made my second batch (the first batch took FOREVER as it was rarely over 35 degrees in there. But nope. Didn’t kill it!), and am happy to be reunited with my beloved Kombucha. I’ve got extra. Come on over.

Patient not-so-little SCOBY patiently waiting for new tea to live in.


New tea, new SCOBY, new awesomeness 


Old kombucha, waiting to start off the new batch....
Bottled kombucha. Sitting out for 2 days to get all carbonated and yummy. I use that particular brand of beer bottle for my ginger beer, too....yummmm....ginger beer. Gotta get on that. I see a lot of Dark 'n' Stormy's in my future this summer...
  

Tuesday, March 01, 2011

Beds!

Please excuse me while I freak out for just a wee minute.

OMGOMGOMGOMGOMGOMGOMG.

Ever since we got out here, we have been working our butts off to make this place 'a farm'. And yes, in a previous post I redefined the term to fit my needs. But I think I have now made a tiny step of progress that no one can deny is definitely a step forward in the farm realm.

I made raised beds.

We have clay soil here, and while I am putting the garden on what seems to have been my great-grandfather's garden, I would still have to add to his already amended soil to be able to do anything. And since I would have to bring in dirt anyway, and I would like to get stuff growing this year, I'm doing raised beds instead of rows in the ground. I am trying to loosen up the dirt under the beds enough so that roots will have that extra bit of room, but this is the ground that broke the tiller, after all.....

My cousin had demolished his friend's shed and brought me what wood was salvageable, and I took down my great-grandfather's shed. Between them I might get 4 - maybe 5 - beds of varying sizes. I'm shooting for somewhere in the 3 - 4 by 8ft range.

So far I did two out of the siding my cousin brought me - and I am very proud of them! 

The unsorted pile of wood from my cousin. It has been covered for the past few months with the sheets of roofing. I also have the door from said shed with a gorgeous glass doorknob...

Untreated side. This is what the dirt will touch. You can tell the wood's not in the best shape, but sturdy enough for garden beds.

I cut off the unusable bits (if there were any), measured all the boards of the same type (as they are the same width and I'm OC like that), and sorted them by length. Easier to piece them together. These guys are tongue-and-groove siding, which was once red.

The only side of the two beds made with 3 whole boards. Woot.

The boards that needed to be pieced together I did so with scrap pieces of wood. I am not afraid of glue, and those screws were used as I happened to have a half of a box laying around. Turns out I used all the screws and was one short for this project - I cannibalized something else for said screw, and no one will ever be the wiser!

The middle piece holds the three boards together, the 2x4's on the end are for the corners. It'll make sense in a minute...

I used two convenient stumps to prop up the long side while I screwed the short side in and made the square (!!) corners. Both sides are screwed into the 2x4 on the corner.

The two L pieces face off!

I made the two L-shaped pieces, put them together, fastened the two remaining corners, and voila!

Two beds. One is 3'x8'x16", one is 4'x8'x10"

The only wood I didn't use - and the stuff on the left was pulled out of the running before I started piecing things together - you can see it's broken or otherwise unsuitable. I've kept it, though, to use as brackets and whatnot for future projects.
I'm also very proud of my new phone's picture taking abilities...