Showing posts with label tutorial. Show all posts

Wednesday, May 22, 2013

Upside Down

My mother is pretty much the best mom ever. Now that I have a big kid AND a little baby in the house, I really don't know how she worked a (more than) full-time job, made all of our food at home from scratch, and took care of us with my dad working an hour away (ie, he got home late and left early).

Not only that, but when we went to people's houses, had meetings, etc (both of which seemed to have happened a lot - or at least that's how I remember things), she BAKED stuff to take.

There are two things in particular my mother used to bake. Both from her copy of The Joy of Cooking. Butterscotch Brownies, and Lightning or Whipped Tea Cake. Both recipes are only found in the form I know and love in the 1975 edition, and both are awesome. I highly encourage you to try them. They are dead simple and so tasty!

And forget about Christmas. We would make 3 - 5 different kind of cookies, decorate them all (just to put it in to perspective the last year we lived in the US and did this on a large scale, we were 10, 5 & 3 years old. And food coloring was involved. You do the math), package them (with ribbon!) and distribute them to friends, neighbors & colleagues.

While I always made me own cakes on my birthday (as soon as I was old enough to... which was pretty young. I don't remember when it was...), every year on my Dad's birthday she makes a Pineapple Upside Cake. And ohmygod it's the best thing ever.

I went through a phase of craving my mother's pineapple upside down cake. I have the 1946 edition of the book (blue cover) here with me (the 1997 edition I left in storage. It sucks) in NC, and so excitedly made the Pineapple Upside Cake.

It's probably a good thing I accidentally left the camper door open for less than a minute while I got something from the fridge outside said door.  The chickens swooped in and ate it (they respectfully left the pineapple rings on the plate). But it was obvious from the batter and the way it baked up that this was NOT my beloved cake.

I humbly asked my mom how hers was so good... and here it is folks. The secret to her amazing AMAZING cake.When she was here with me after the bebe was born and I FINALLY could manage to get out of bed - the craving for this cake kicked in. Full force. I made the cake.

The topping is a la the true recipe, and the cake part is the aforementioned Whipped Tea Cake. Whoa. Mind blown. Alas, it does not exist in any other edition that I have found, and so she scanned her recipe page and sent it to me:

Original page
I made the bottom cake portion true to the recipe - I happened to have cake flour on hand, and we needed to buy sugar anyway.  In Japan cake flour was not easy to come by, and we never had white sugar in the house. Only light brown (my mother does not pack her brown sugar when measuring. Ever.) My mother never had cake flour - and this recipe never suffered from substitutions.

It was exactly what I wanted needed, and was amazing.

Yesterday I craved it again. I didn'/t have any pineapple in the house, but I have a whole bunch of frozen fruit. I happened to have an open bag of cranberries, so used those. Awesome.

Soft cake. Crispy edges. Gooey nuts. Ohmygod.


RECIPE (PINEAPPLE VERSION)
Adapted from the Joy of Cooking

Topping:
1/4 cup butter
1/2 cup brown sugar
1 cup walnuts
8 slices of pineapple*

Cake:
1 3/4 cup cake flour
1/2 tsp salt
1 cup sugar
2 eggs
1/2 cup + 2 1/2 teaspoons milk**
1/2 cup room temp butter
1 tsp of vanilla extract
1 1/2 tsp baking powder

Make Topping:
  1.  Melt butter in a 9-inch (you know, the regular size) cast iron pan.
  2. Add sugar. Stir until all the sugar is wet. 
  3. Turn off heat.
  4. Mix in nuts
  5. Lay out the slices of pineapple in a ring with one slice in the middle on top of the topping.
Make Cake:
  1. Sift cake flour, salt & sugar into a bowl.
  2. Add eggs, milk & soft butter.
  3. Beat the hell out of it with a hand mixer. You're aiming for light and fluffy here.
  4. Fold in baking powder.
  5. Pour on top of pineapple & topping
  6. Bake at 350 for 40-50 minutes, or until done. You don't want to overcook it - the sugar topping will burn
  7. Let cool - but only kinda.
  8. Flip the cake out onto a plate when the cake is cool, but the topping is still a bit warm. If you let it cool all the way down, you'll leave the topping behind in the pan.
  9. Hide somewhere alone and eat the whole damn thing.

Cranberry version:
I did the same as above but substituted one cup of cranberries (what was left of the bag) for the pineapple. If I were to do it again (and I will) I would do a whole bag (2 cups) of berries and add a dash of cinnamon. I did not adjust the sugar level - with the berries being frozen they stayed in their berry form and I liked the tart pops in the sweet topping. If you don't, you could always cook the berries a bit in ONLY the butter (until they burst) and then add the sugar. You don't want to cook the sugar as it'll get too hot when it bakes and you get grainy topping. It's ok if you're into that sort of thing. I like it gooey.

*most of a can. Leaves enough pineapple juice for a cocktail with a slice or two for 'garnish' :)
** Yes. It seems silly. But you have to have the 2 1/2 tsp milk. Trust me on this.

Wednesday, March 20, 2013

Never Rains But It Pours

So... we're not getting any new chickens this spring. Other than the 3 bitties we have that hatched, that is. But odds are at least 2 of those will be roosters, so my point is: we're not getting any significant number of new egg layers this year.

What this really means is that EVERY hen we have now will go into a molt and stop laying for the late fall and winter months this year. Which means no eggs. (or very, very few). Last year we didn't get any eggs for about 2 months. I even *gasp!* bought eggs. (From the co-op. Pastured.) As close to MY eggs as I could get. And worth the price to not be too greatly disappointed by the difference in quality.

And now that it is springtime every hen we have is in laying overdrive. For a while a few of them were laying off in the woods (as you may know) where we couldn't find them and all was OK in the world. This week everyone has gone back to laying in one of our 10 nesting boxes (although I keep getting hens coming out of our new shed with no door squawking their egg-laying achievement... I just can't find any...) and we have more eggs than we know what to do with. As in 8 - 12 eggs a day. Oh boy.

But the chest freezer (best birthday present ever! Thanks Lone reader!) comes in here to the rescue. You can freeze eggs. Woohoo!!

My favorite method is not below. Because my favorite method involves cracking one egg each into the well of an ice cube tray, freezing them, and then popping them into a big old ziploc bag. Wash, rinse, repeat. That way you can pull whatever number of eggs you may require at a time and use as needed.

Alas, I currently don't have any ice cube trays.

And I can not find one with big enough wells for a whole egg (and I don't live in the bay area anymore so those awesome Asian dollar stores that always carry this sort of thing is beyond my reach...).

So my second favorite method:

Figure out how many eggs you want to put in each bag. Label said bag. Use a big sharpie. You know you want to.

Put the bag in a cup, bowl, tupperware - anything that will hold the back with its contents. Flip the fastener portion over the sides to hold it in place, and to help keep from getting egg on said fastener. You're welcome.

Break all yolks. You don't want to add air - just bust them. Why do you do this? No idea. But anyone I've ever spoken to who freezes eggs does this. If you know, let me know.*

Lay flat, and put in freezer flat. That way they will both freeze and defrost faster than if you leave them in a clump. In fact, whenever you freeze anything in a bag, you should do it this way. Again. You're welcome.

This pile of eggs (plus another 8 I pulled from the fridge)...

...turns into this pile of shells.
I freeze them in 6 egg chunks because that's the amount I use most frequently. I don't bake a lot of cakes, etc, anymore - but I make a lot of fritatas. And when I do it's usually in 6 egg increments. So really whatever works.

What to do with the shells? You can do any number of things. I dry them out, grind them up, and feed them back to my chickens. It's the best way for them to absorb calcium back into their systems, and that way we don't have to buy any other supplements for them.

They're also great in gardens. Many many plants do well with a calcium supplement (brassicas and tomatoes are probably the most famous...) and you can grind them up finely and sprinkle on top of the soil, or in the bottom of your transplant hole when putting in seedlings. Or you can grind them up more coarsely and sprinkle around the base of your plants to help deter slugs, cutworms, and a number of other garden pests that might not enjoy crawling over such a sharp surface.

Some people with more time and energy than I blow the eggs out and use the shells for crafts. (I wish I had the energy!).

Or toss 'em in the compost pile.

*If you freeze the whites and yolks separately, you do need to add a scant amount of salt or sugar to the yolks to keep them from coagulating. These two things may be related. My chemistry's not so good. And my copy of Harold McGee is in storage and I can't get to it. So. Again. If you know, let me know.

Wednesday, April 11, 2012

Belated Epiphany

So... As you know, the clothesline is king around here. I am proud to admit that a) the manfriend brought a dryer when he moved in with me (whoopee!), b) it has never been used (or plugged in*), and c) I have solved the single most annoying laundry conundrum I have had my entire laundry doing life: the single sock issue.

Oh? You didn't want to read a blog post about single socks? Ptooey.

Contrary to popular belief, single socks do not have their own planet that they disappear to.** And crafty as I may be, I do not have a single sock hamper or any such nonsense. I don't have the time, space, or energy, frankly.

I had a sock related epiphany recently and am proud enough of it to share. Also I thought it'd be a nice break from a chicken blogpost :)

So what I do is... I hang up the socks on the clothesline in pairs. I don't bother rooting around in the hamper among the wet clothes for matches, I just hang up single socks on the line and match as I go. Then when I take in the clean clothes....wait for it....WAIT FOR IT....

I leave the unmatched singles outside on the line.

This way when I next do a load of laundry, any single sock in the hamper has a chance to meet its match up on the line. Oddly enough this has greatly reduced the number of single socks I have been stuck with. As in I now I have a single sock every other load or so. (I know. Mind blowing.) This is awesome as well as I have a 7 year old that has the habit of taking his socks off every- and any- where. While I know he owns maybe a gazillion pairs, this helps ensure that every lost sock he owns has a pair :)

Obviously this also means that I am OK with my socks staying out in a rain shower or two, but honestly I can only imagine that the sun and rain do nothing but help our assortment of sports socks that get some pretty heavy wear. 

Yet another upside to this method is that I do not spend copious amounts of time sitting on the floor surrounded by a pile of socks trying to match them while TV's, DS's, laptops, child, roosters, chickens, dogs and whatnot are blaring in the background on the equivalent of a Sunday night on the equivalent of no sleep.

It's the little things!

That little guy met his match in the next load.
* it lives in the barn as a storage vessel

** come ON! GET THE REFERENCE!

Tuesday, October 11, 2011

One Thing Just Leads Into Another - Butter!

Working at a co-op means I basically work at a grocery store. (Basically). One of the perks of working in such a place, is that expired food is often up for grabs to the staff - and grab it we do (it also helps to be nice to the guys in grocery. They're nice guys anyway, but it's nice to get the headsup when stuff goes out of date and becomes available to us vultures).

A few weeks ago 6 pints of Organic (co-op!) Heavy Whipping Cream went out of date. One of the grocery guys who I've become friends with came up and off-handedly asked me if I wanted them. Umm. Yes. He looked at me like I was insane, but I thought it would be a good opportunity to make butter with the spawn. Besides, homemade butter is SUPER tasty, and unless you've got farmer friends, get a realy good deal at a farmers' market, or you come into some out of date cream, who's gonna spend the money on cream just to MAKE butter?

It's totally worth it, mind you.

But I digress. Back to butter.

First: get a butter churn. You can also use a mason jar and shake, but let's face it. This is tiring, and not nearly as fun as this:

The Modern Butter Churn. Or a stand mixer, if you will
Then pour in the cream, turn that puppy on, and stand back. I also drape a towel around the bowl as I have a tendency to skip the low and medium settings and go straight for high, thus sending cream all over everywhere.

I might have to interject that you really can't screw this up - in fact, if you've ever screwed up whipped cream and gotten a dry mass, or worse, a broken mass, then you've already embarked upon the journey of butter making. Relax. You got this.

Whipped Cream.
 If, at this point in time you remebered that you have some berries, fruit, cake, or some such item that may need a whipped embellishment then feel free to scoop some out and take a tea break. Otherwise hold your horses, you're not done yet.

And now the Whipped Cream is starting to look dry....
 Keep going.

You can kind of see liquid pooling up...this is buttermilk.
You'll see yellow clumps forming up here and there amongst a pool of white liquid. This, my friends, is what you've been waiting oh so patiently (yeah - like 5 minutes if you've used a mixer) for. The yellow clumps are butter. The white liquid is buttermilk. This is NOT the cultured buttermilk that you can buy, and unfortunately is an uncommon item here in the west. I love it. I use it in all sorts of baked goods. Umm. Yum.

Next up: strain the buttermilk out from the butter. (and save the buttermilk!). I put a strainer over a (usually too small bowl), line it with a floursack towel (traditionally butter muslin or real cheesecloth. Do not use 'cheesecloth' bought at the supermarket. We will no longer be friends.). Then instead of patiently waiting for most of the liquid to strain out, I gather the corners and squeeze, getting all of the buttermilk out of the butter, and a fair amount of it all over my counter.

Strained, unwashed butter
You still have another step before you can devour said butter. You gotta wash it. That sounds weird, but when you've just strained it it's still got pockets of buttermilk here and there, and they'll make the butter go rancid rather quickly and you don't want that.

What I do is put the butter in a bowl, run cold water into it, knead it a few times with my hands, rinse, repeat. After 2 or 3 times the water will run off clear - and then you're done!

Washing, washing.
 Then strain. Again.

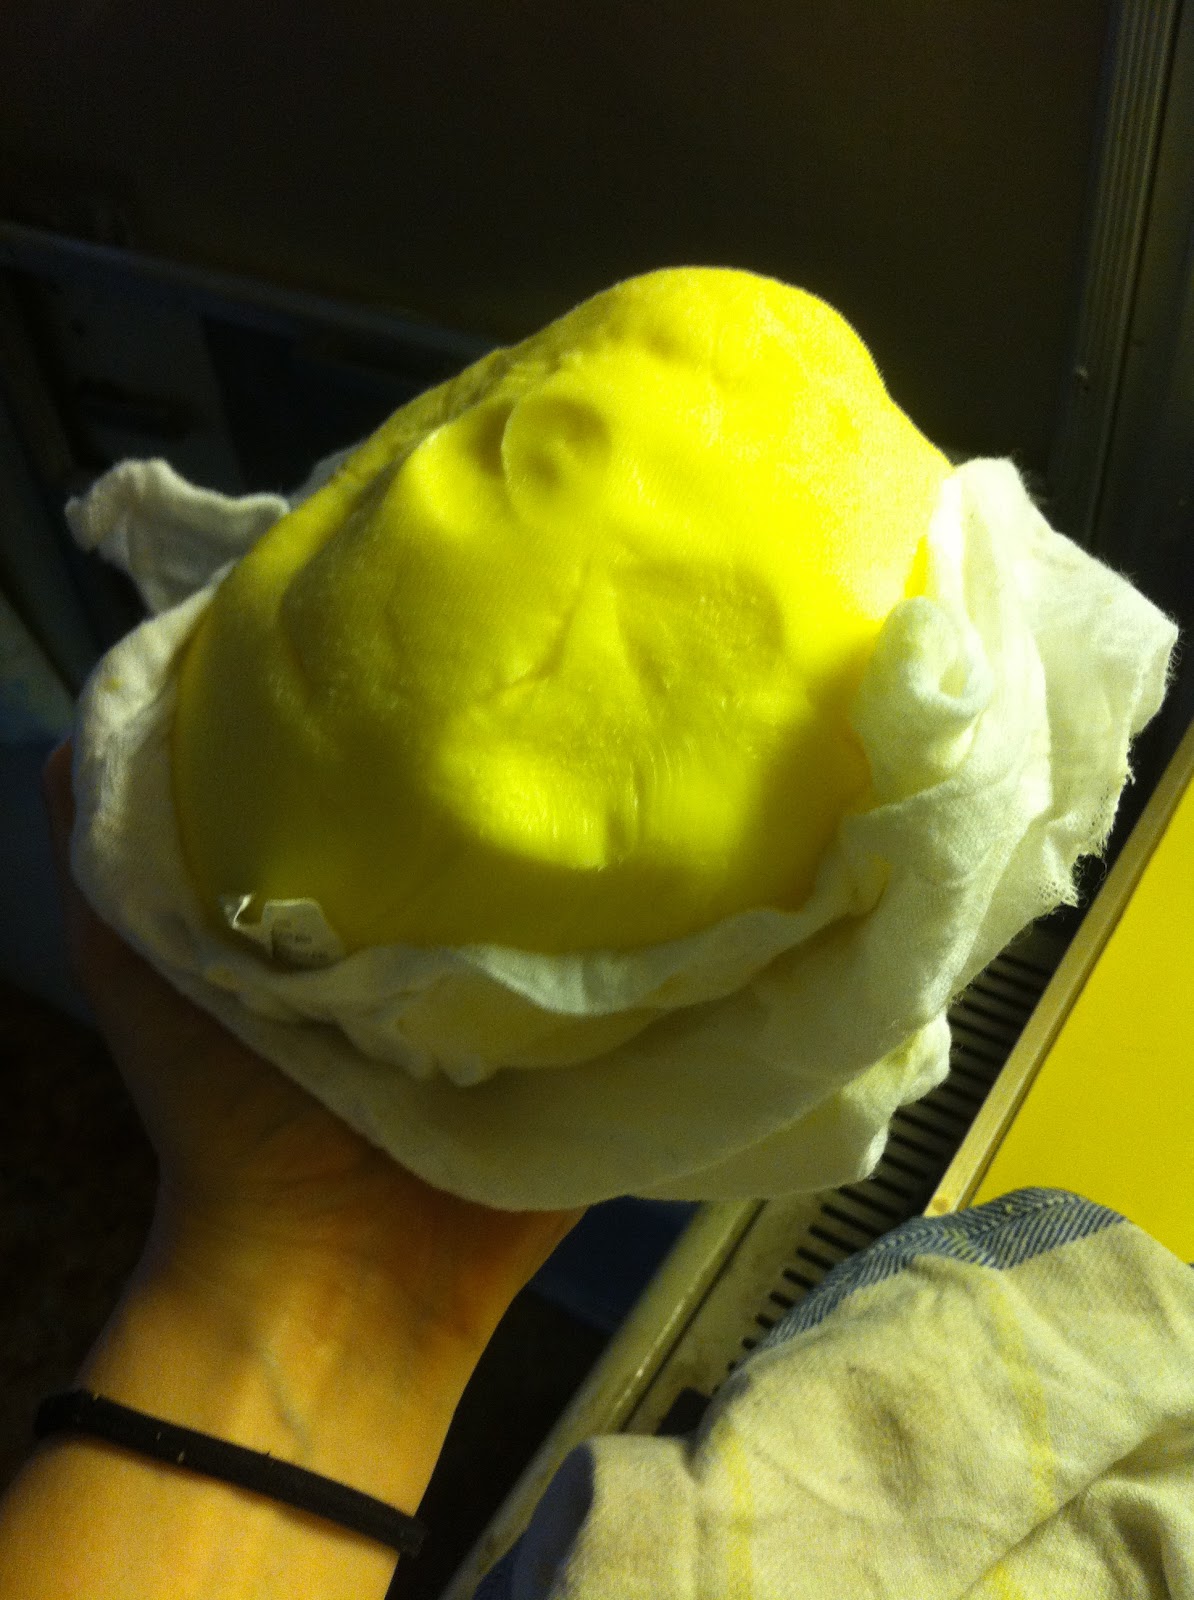
Butter!
 At this point you can add salt if you want. Or herbs, if you feel the need to really go for it. I love salted butter, but have a tendency to leave this stuff unsalted - so I can put a big pat of it on warm bread and srpinkle some salt on top. (OK. Wishing I had some now!)

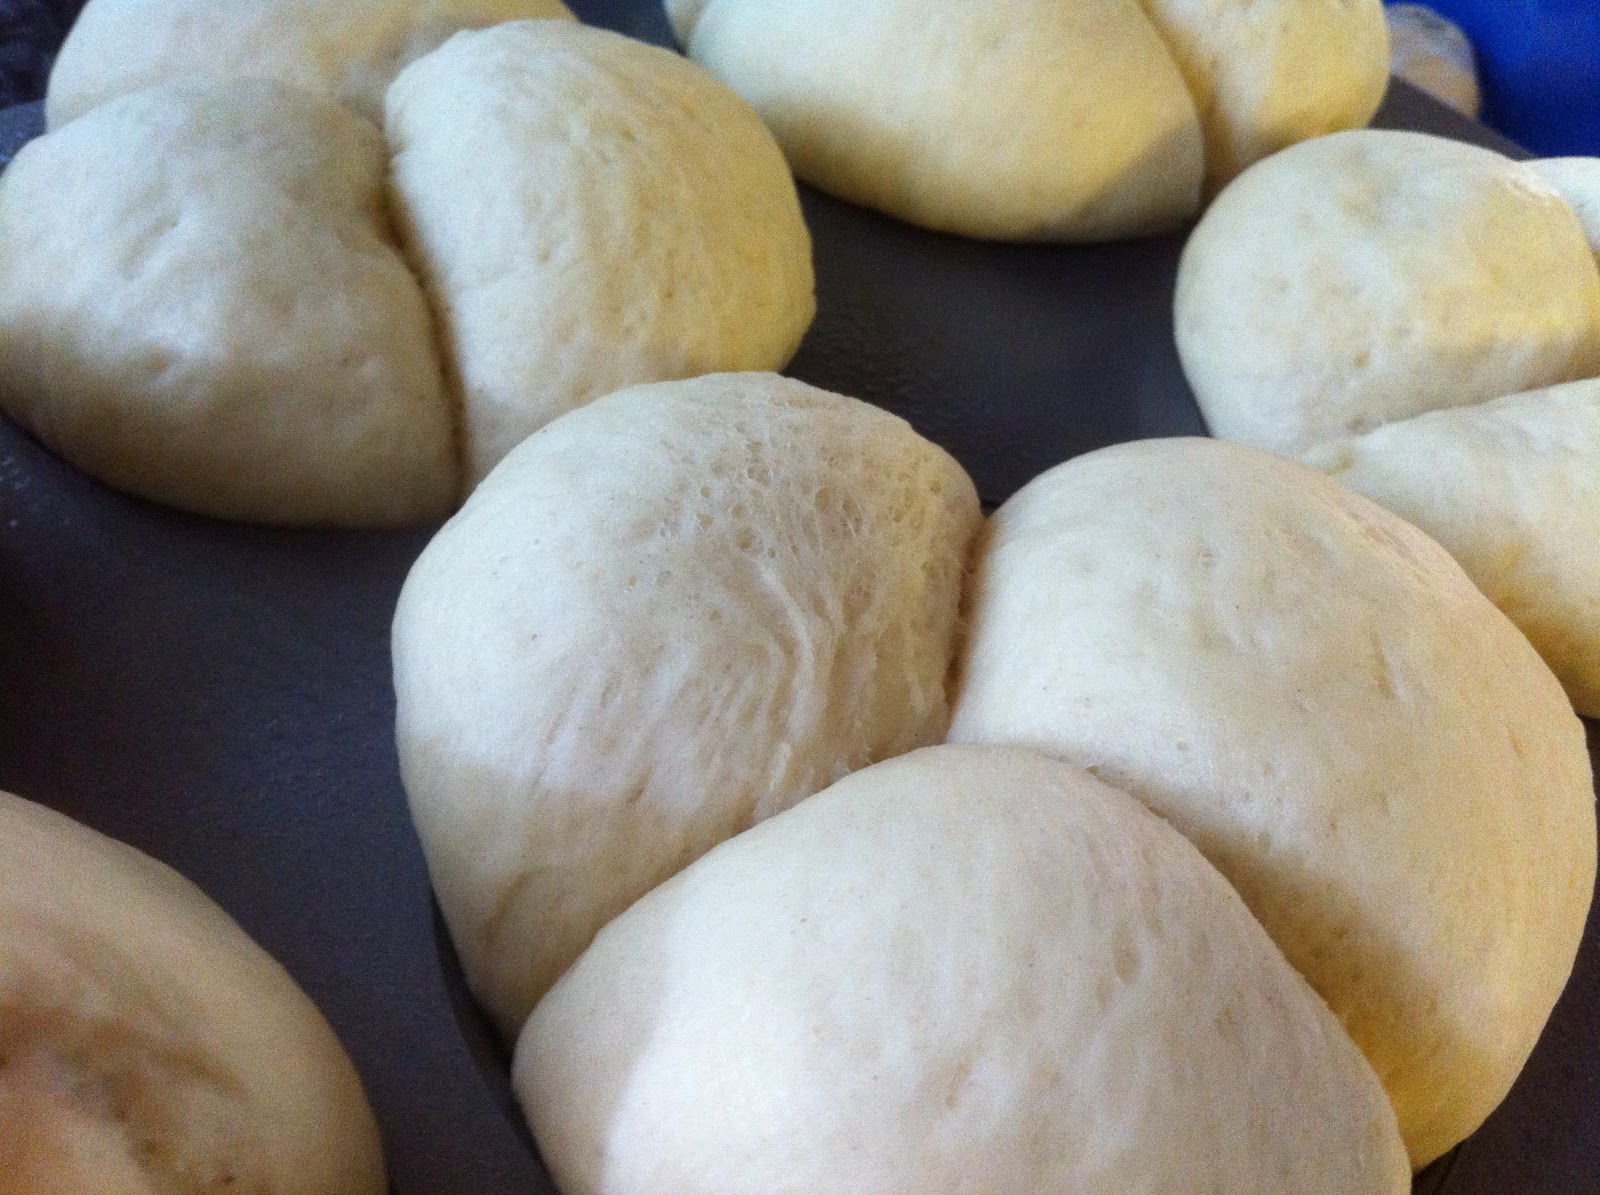
One thing tends to lead to another, and now that you've made tasty tasty butter, and you have tasty tasty buttermilk, you gotta make tasty tasty bread.

I make cloverleaf rolls out of the Joy of Cooking, but this recipe is similar. The main difference seems to be that JOC uses butter, not shortening (butter!). Regardless, you're replacing the milk in the recipe for the buttermilk you just made. I ALSO highly recommend making pancakes with said buttermilk. Awesome.

Buns!
I am one of those people that insists on making everything from scratch once. Be it bread, soap, pickles, whathaveyou - so I urge you to try making butter once, if you aven't already. And if you have - then revisit it! So much fun!

Oh - and I ended up making the butter myself and without the Spawn, although he and the Man both thoroughly enjoyed the final product. I did tell the little guy all about the process, and much to his boredom and my surprise - his class ended up making butter at school the next day. Hehe.

Thursday, July 28, 2011

Shrubbery!

Back when the blueberries first came in, I made a shrub syrup out of those first berries.

For the longest time it looked like the blueberries may or may not come in - they were wizening (yes, this is one of my favorite words. I also made it up. Look up "wizened") on the bush before ever ripening. It's like they went from unripe berry - to dried fruit. It was sad.

And then we got 2 inches and then 5 inches of rain (in 2 days. Yes. A LOT of water), and voila! Berries. Just in the nick of time.

I love pies, and jams and whatnot - but dude. I live in a tin can, and it's effing HOT outside. Turning on the oven, or slaving over a stove, is completely not on my list of things I want to be doing right now. And then a few of the blogs I subscribe to started mentioning 'shrub syrups'. Better yet - a cold processed and therefore a way to do it with NO time on the stove! I was in love.

In a nutshell, here's what I did:

Start with one cup of berries.

I used half of these.
 To the one cup of berries I added one cup of sugar, and a potato masher. Mash everything together, and then I let it all sit overnight in the fridge. In theory this allows the sugar to draw the juices out of the berries.

When I pulled it out the next day, not the biggest change. Nevertheless, I pushed forward and put the whole thing in a "cheesecloth lined strainer" (see here for appropriate rant on cheesecloth). Blueberries have really thick skins and these weren't the juiciest (see aforementioned rant on lack of rain and wizening...), so putting them through "cheesecloth" (read: flour sack towel of the cheapest variety) didn't do anything, really. I got a teensy amount of juice, but really not anything proportionate to the amount of berries I put in it.

This is after an hour. No joke.
 So I gave up on the "cheesecloth" and just mashed them through the strainer - even if this would leave me with seeds in my syrup.
Muuuuuuch better.
 At this point you're supposed to be able to add the apple cider vinegar to the strained syrup, mix, let meld, and then you're done. I wasn't OK with this. I wasn't exactly convinced all the goodness had been gotten from the berries - mostly due to the lack of "cheesecloth" squeezing that I normally would do in this situation.

So I poured the vinegar over the leftover berries in the strainer, and mashed it around a bit thus essentially giving the berry husks a second spoon-squeezing ordeal to go through.

Vinegar. That is a measuring cup, not a sauce pan. I can understand your confusion.

Strained + Vinegared - you can see the tiny seeds at the bottom. Ignore those.
  Then I dumped the whole thing in a jar. That was conveniently EXACTLY the right size -

Shrub syrup!
 And there you have it. The Stoneyhaw Blueberry Shrub Syrup. I tasted it before I put it into the fridge to "mellow" and my reaction was.....KAPOW! I got literally assaulted by blueberry, sweet, and vinegar. All distinctly, yet all together. It was intense.

Shrub with club soda.
So how was it after letting it sit in the fridge for a couple of weeks? Still intense. If not intenser. Everything had mellowed out and melded together - yet stood out more. Crazy. And so good! I'm currently addicted, and thinking about making more.


*just remember that apple cider vinegar can have a laxative effect - especially if you're sensitive to it, or if you drink a lot of it. It won't harm you, but it might not be pleasant if you drink too much. The good news? You'd have to drink a lot of the shrub syrup to get that effect. I'm just sayin'

Friday, April 15, 2011

Weird Food

I came across this post* today, and was reminded of weird food I used to eat in boarding school in Japan.

Now I have to interject - before I really get started even - to say that there's weird food and then there's weird food. I am not talking about food that is innately weird to you but wouldn't be to a Japanese person (Tamago Gohan, for example. Yum. One of my all time favorite breakfasts and yet another reason why I want chickens!). I am talking about bona fide weird-ass foods. Got it? Good.

Our boarding school had a strict 3 meal a day sit down thing going on - and the dreaded stint of kitchen duty always seemed to come around waay more often than necessary. However. On Sundays lunch was not a sit down affair, but a show up for roll call and take it away bread lunch.

OK. Another goddamn interjection. Bread, or "pan" (I always thought it was derived from french, but Wikipedia disagrees with me) in Japanese, encompasses all things bread in Japan. From sliced bread (that's about 1 inch thick and resembles what we make Texas Toast out of here) to savory breads stuffed with curries and stews, sweet breads stuffed with sweet bean paste, pastry cream or chocolate - steamed breads, fried breads, baked breads.... suffice it to say there are a lot. Basically think of a food, slap the suffix '-pan' on the end, and some bakery somewhere in Japan is selling it.

So. For this relaxed Sunday lunch we usually got a sweet bread and a savory bread. On really lax days for the savory option they gave us a slice of bread (aforementioned monster minimally 1-inch thick white bread that's perfectly *perfectly* square...) and a little plastic container of sweet peanut butter spread crap. Blech. Thankfully the cafeteria was decked out with 4 toaster ovens (about 250 girls lived in my dorm...), and a few of my friends and I improvised. We came up with the Best. Thing. Ever. (or at least the best thing since sliced bread. ha!)

First you take a slice of monster white bread. Then, being very careful not to smoosh the fluffy that is the actual white part of the bread, you squirt on a healthy dose of Japanese Mayo. Only Kewpie brand will do, really. Yes. They sell it here in the US. (and check out the history of the company - they've been making it since 1925!) Worth every penny. Admire the fantastical star tip they inexplicably put on the squeeze bottle of mayo and the pretty designs it has created, and then using the side of the plastic knife that came with your individually packaged slice of monster bread, spread. Gingerly people! Do NOT ruin the integrity of the floofy.

OK. That done, mix up a package of Natto (I like Okame brand the best. This can also be found in Japanese and Asian markets here in the US. Be sure to use all of the included sauce and Chinese mustard. What? You don't like Natto?!?! We can not be friends. What's NOT to like in a small styrofoam box of fermented soy beans that smells like a cross between foot and foot fungus?!). Spread Natto on top of Mayo. Need I remind you to mind the integrity of the softness? No? Good.

Next. Put a fair amount of shredded (crappy) dry mozzarella (as processed as possible to get that authentic high-school-my-arteries-are-made-of-steel-devil-may-care-or-not-attitude feel) over the whole thing. I'm not sure why we always had crappy shredded cheese, but we did. This tasty concoction was thought up using stuff we always had on hand, so we must have.

Transfer the whole thing to the toaster. This process will definitely include a minor panic attack induced by the weight of the toppings making the middle of the bread sag and looking like the whole thing will fall, but you must push through. Toast on the rack (not the tray. Unless you like soggy bottoms) until the top is brown and bubbly.

Attempt to eat said creation, burn the shit out of the roof of your mouth, swear profusely, and continue eating. Seriously. It's the Best. Thing. Ever. (And I haven't thought about it in years!)

UPDATE: not 5 minutes after I originally posted this, I got 2 emails slamming me for not posting a picture. Please forgive me (sarcastic tone). I just can't recreate it authentically in a timely manner. You're just going to have use your fantastic(ally unused) imagination on this one. Snarky? Not me. No. Never!


*and I can't wait to try frying my grilled cheese in mayo. Both grilled cheese and mayonnaise are sacred items in my house, so it only seems natural that the two should be married, IMHO.

Tuesday, March 01, 2011

Beds!

Please excuse me while I freak out for just a wee minute.

OMGOMGOMGOMGOMGOMGOMG.

Ever since we got out here, we have been working our butts off to make this place 'a farm'. And yes, in a previous post I redefined the term to fit my needs. But I think I have now made a tiny step of progress that no one can deny is definitely a step forward in the farm realm.

I made raised beds.

We have clay soil here, and while I am putting the garden on what seems to have been my great-grandfather's garden, I would still have to add to his already amended soil to be able to do anything. And since I would have to bring in dirt anyway, and I would like to get stuff growing this year, I'm doing raised beds instead of rows in the ground. I am trying to loosen up the dirt under the beds enough so that roots will have that extra bit of room, but this is the ground that broke the tiller, after all.....

My cousin had demolished his friend's shed and brought me what wood was salvageable, and I took down my great-grandfather's shed. Between them I might get 4 - maybe 5 - beds of varying sizes. I'm shooting for somewhere in the 3 - 4 by 8ft range.

So far I did two out of the siding my cousin brought me - and I am very proud of them! 

The unsorted pile of wood from my cousin. It has been covered for the past few months with the sheets of roofing. I also have the door from said shed with a gorgeous glass doorknob...

Untreated side. This is what the dirt will touch. You can tell the wood's not in the best shape, but sturdy enough for garden beds.

I cut off the unusable bits (if there were any), measured all the boards of the same type (as they are the same width and I'm OC like that), and sorted them by length. Easier to piece them together. These guys are tongue-and-groove siding, which was once red.

The only side of the two beds made with 3 whole boards. Woot.

The boards that needed to be pieced together I did so with scrap pieces of wood. I am not afraid of glue, and those screws were used as I happened to have a half of a box laying around. Turns out I used all the screws and was one short for this project - I cannibalized something else for said screw, and no one will ever be the wiser!

The middle piece holds the three boards together, the 2x4's on the end are for the corners. It'll make sense in a minute...

I used two convenient stumps to prop up the long side while I screwed the short side in and made the square (!!) corners. Both sides are screwed into the 2x4 on the corner.

The two L pieces face off!

I made the two L-shaped pieces, put them together, fastened the two remaining corners, and voila!

Two beds. One is 3'x8'x16", one is 4'x8'x10"

The only wood I didn't use - and the stuff on the left was pulled out of the running before I started piecing things together - you can see it's broken or otherwise unsuitable. I've kept it, though, to use as brackets and whatnot for future projects.
I'm also very proud of my new phone's picture taking abilities...

Monday, February 28, 2011

I Am Addicted To Crack (Thanks Indiana!)

And by crack I mean green tea lattes from Starbucks sans syrup. Their matcha already has sugar mixed into it, I don't see the need for the syrup - it really just makes my teeth hurt. The man (and one of my favorite baristas) thinks they taste like grass, I think they're awesome.

Alas, my relationship with said crack is sometimes strained for one of two reasons: 1) I'm unemployed and broke and the $3.77 could be spent on groceries or gas, and 2) I'm trying to be productive and going to Starbucks = leaving the property = not being productive (unless I'm also going to upload several blog posts and look for jobs online).

Thankfully, on the days that I don't go into town, I don't need to be without my crack. I make one at home.

It's actually pretty easy to make foamy milk (notice I did NOT say 'steamed') at home. My Dad heats milk up in a saucepan and stands over it with a whisk and twirls the whisk meticulously to make a nice foamy milk for every latte he has every day (this adds up to oodles. Just so many cups of coffee....). Or he did until I got him a nespresso. The best gift I've ever given him. Especially since they weren't that popular when I got it for him and they were a good $20 cheaper.

There's also the microwave option.

I don't have a microwave, and I'm not going to stand over a saucepan with a whisk. I'm just not going to do it.

This is my solution:

Utensils. Not shown: spoon.
Heat milk on the stove. While milk is heating, add desired amount of matcha and sugar to jar with a lid. A new lid. Not last year's jam's lid. You'll thank me later when hot green milkiness stays in the jar instead of spewing out all over the place.

Add a teensy bit (like a tablespoon or so) of hot milk to the jar, and stir/smoosh with a spoon to get rid of any lumps. You can also swizzle with a whisk, but that defeats the purpose of making it this way - you could have just done the whole thing on the stove with said whisk. You can also ignore this steps if you don't mind getting some small lumps of green tea at the bottom of your jar. I don't care and usually don't want to get a spoon dirty.

Pour the hot milk into the jar. Close the lid. Firmly. Check to make sure it doesn't leak. (If it does, just wrap a kitchen towel around the band and hear me chanting "I told you so" in your ear as you curse last year's jam's lid). Shake like hell.

Enjoy!

Crack. Not very green, as my matcha is not very new.

Where do I get matcha powder? Honestly - from my mom. She lives in Vancouver and has better access to Asian goods. Asian grocery stores usually carry it, and you can get it online from amazon and tea companies and the like. Beware of tea aisles in conventional supermarkets - 'matcha teabags' are a trend. A trend that makes no sense to me, whatsoever, btw.

Sunday, January 23, 2011

Whoa I forgot: Pim's Lamp

So..... in going through all my photos in an attempt to be organized, I came across a bunch of photos that I took MEANING to write up making stuff. A tutorial, if you will. So.

Da Da DUMMM!!! From the archives! The Pim's Lamp.

And some pictures didn't come out right. So sorry. (Somehow I don't think the Lone Reader cares. Hi Mom!!)

You will need:
  • old light bulb
  • pliers
  • area that tiny shards of glass can get all over
  • sand (or something abrasive)
  • plastic cap (mine came from a kombucha bottle, actually)
  • hot glue gun, funtak, or something uber sticky
  • metal bit (washers work)
  • super strong magnet (you know - the itty bitty ones)
  • lamp wick
  • lamp oil
  • metal cap that will fit over the end of the light bulb (liquor bottle caps often work well) 
  • ice pick, awl, power drill - something pokey 
So first things first. You need to get to the inside of the light bulb. If you look at the base of the bulb, it's got a little round metal piece in the middle surrounded by brown glass. If you hold on the light bulb firmly and essentially try to grab the little metal thingy with a pair of needle nose pliers, the glass holding it in will shatter (and go EVERYWHERE), and you'll be able to pull out said metal thingy and the filaments from inside the bulb. Make sure to get as much of the glass off the rim of the bulb. Then fill the bulb partially with sand (or in my case tapioca pearls as I didn't have any sand...), shake around and rinse out - all the white coating on the inside will come out nicely. Seriously. Take my word for it. 

This one got a bit bent, but since it'll be covered, it matters very little.
Light bulb, cleaned and out of focus.
Next - take your plastic cap to something that the bulb will sit nicely on, and flood it with hot glue, funtak, whathaveyou. Put your metal bit in the sticky substance. Your light bulb is going to sit on this (but not be adhered to it) so make sure that the metal bit doesn't come up over the top of the plastic cap.

Trivia of the day: Canadian quarters stick to magnets, American magnets do not.
Find your metal cap that at this point has most likely rolled of your table and onto the floor, under your chair, and is covered in dust bunnies. Not that I'm say your house is dirty, mind you.... You're gonna poke a whole in the top of this lid to pull the wick through. I used a power drill, hence the edge is slightly rough (I went back with a broken pen and curved that down and in). It's not entirely important for this to be perfectly smooth, but it looks nicer that way.

Punctured Pim's. (no Pim's was harmed in the making of this lamp)
Pull the wick through the hole. My wick was too wide - I cut it in half, lengthwise.

You starting to see it yet?
Put your magnet in your empty and clean light bulb. Fill halfway or so with lamp oil. Then and ONLY then put on the base. If you put your magnet in the empty bulb that's already sitting on the base you MIGHT shatter the bulb. Especially if your super strong magnet is super strong.

Almost there!
Put the metal cap on the assembled bulb. Sit back. Admire. Let the lamp oil soak up the wick. Light it. Cuss profusely. Blow it out. Trim the wick back to 1/2 inch (to reduce smokiness). Relight. Pat yourself on the back.

Done!
This takes forever to explain, no time at all to make.

It also can be done with bigger containers.

Classic.